After my PV and battery upgrades last year, I went a couple of months without running the generator at all. Sounds good - but since the waste heat from the generator is what provides our domestic hot water, I was in the silly position of having to light a fire once a week just so we had hot water!
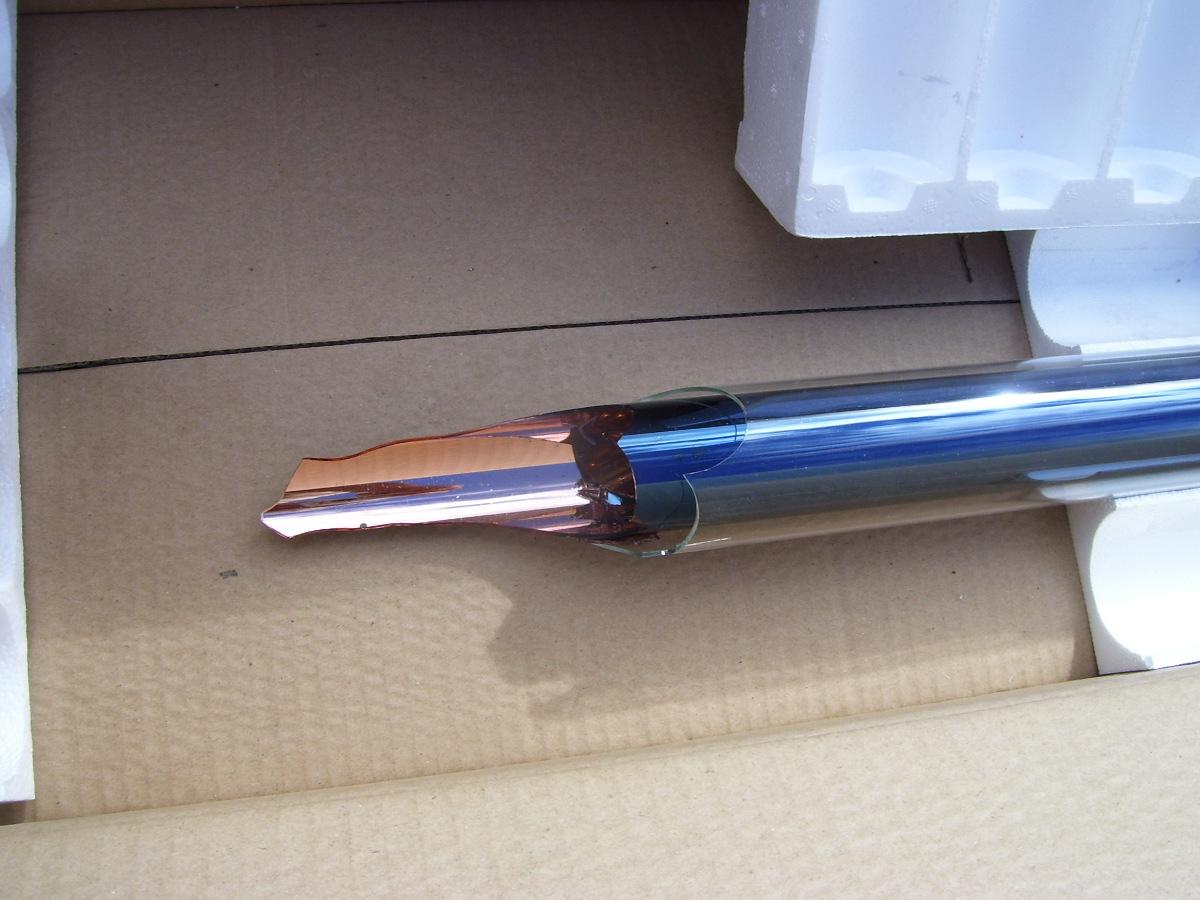
My cure to the problem was to spend up and get a cheap evacuated tube solar water heater. These tubes are made of borosilicate glass. Their construction is much like a thermos flask - 1.8m long by 57mm dia (about 6' x 2.5" dia). They're two tubes, one inside the other. The inner tube is coated with a "selective surface" that absorbs as much solar energy as it can, while reflecting and re-radiating as little as it can. The space between the two tubes is a (near) vacuum to prevent heat escape by conduction and convection.
Here's a tube (broken in transport) to show whats inside:
A central manifold connects (and seals) the open end of all the tubes. The way I'm using it doesn't require a header tank. It would thermosyphon nicely, but I don't have a tank above it. I really should raise the assembly a bit to catch a few more watt-hours during winter but this will do for now.
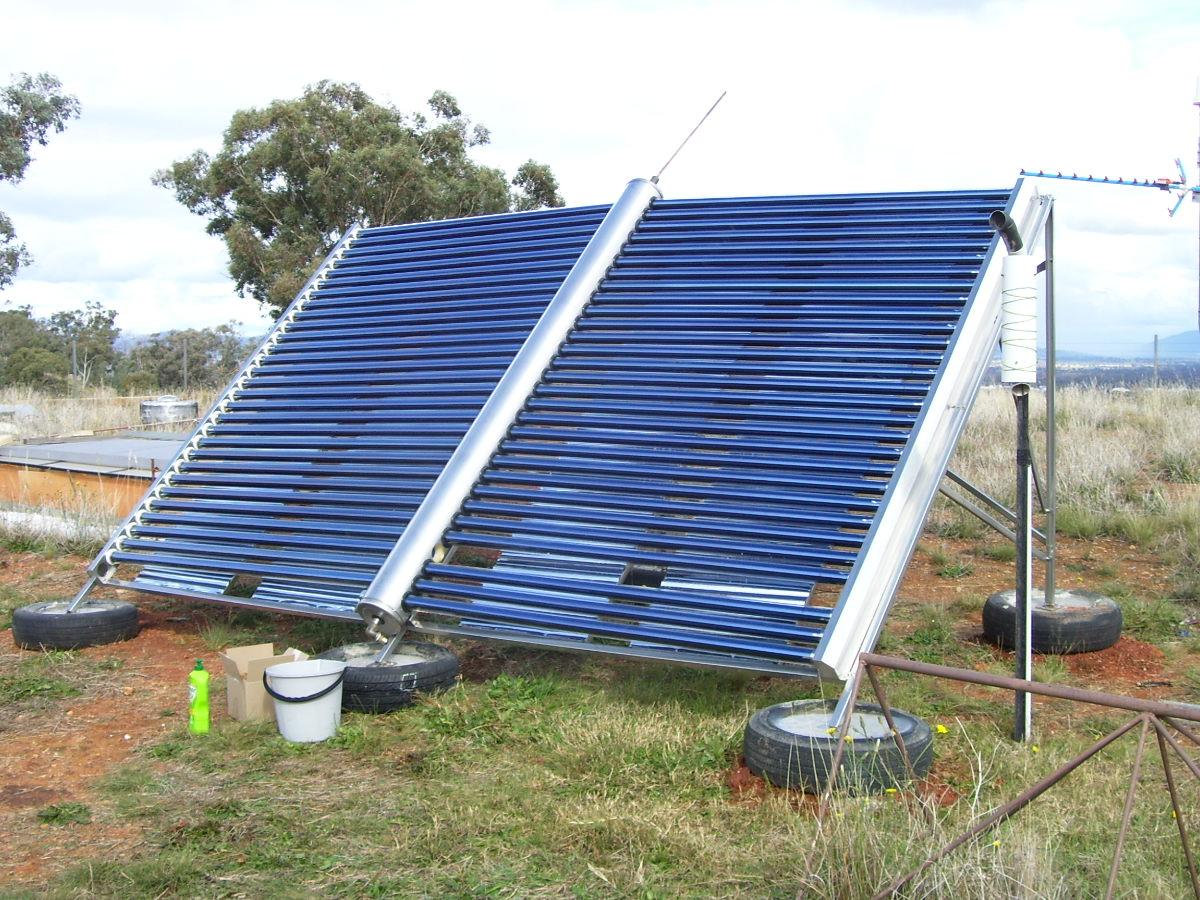
This thing will boil water in a few minutes, so I've got a circulating pump to keep it under control. It heats my inside "storage tanks" which are 2x2000 litre, so they hold a fair bit of heat. Primary purpose is for domestic hot water, but surplus heat is pumped through the concrete floor slab to provide heating.
My original layout used a simple breather tube to let steam out, and ensure the system couldn't pressurise much, but the water flow rate I needed to keep the water from boiling in midday sun made the riser pipe impractically high, so another option was required.
I tried to get a commercial TPR (temperature/pressure relief) valve, but the lowest pressure anyone had was 800kPa (about 100psi - or about 90psi more than the tubes are rated for). I found some low-pressure ones, but no way could I justify $350-$400 on one!! So...
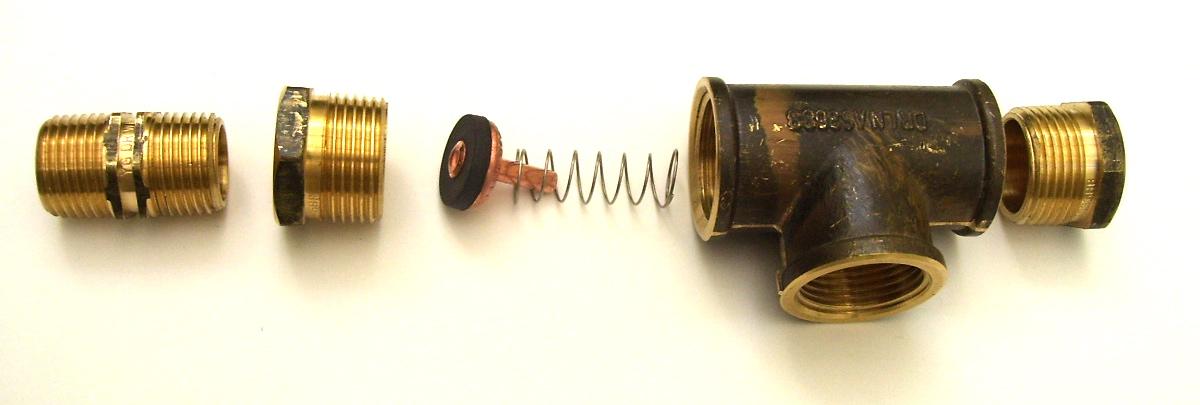
I dug around in the parts box and the plumbing supplies store and collected the bits I thought I would need, and headed to the workshop. I reckon there's about $20 in bits all up.
Everything is stock standard, over-the-counter parts:
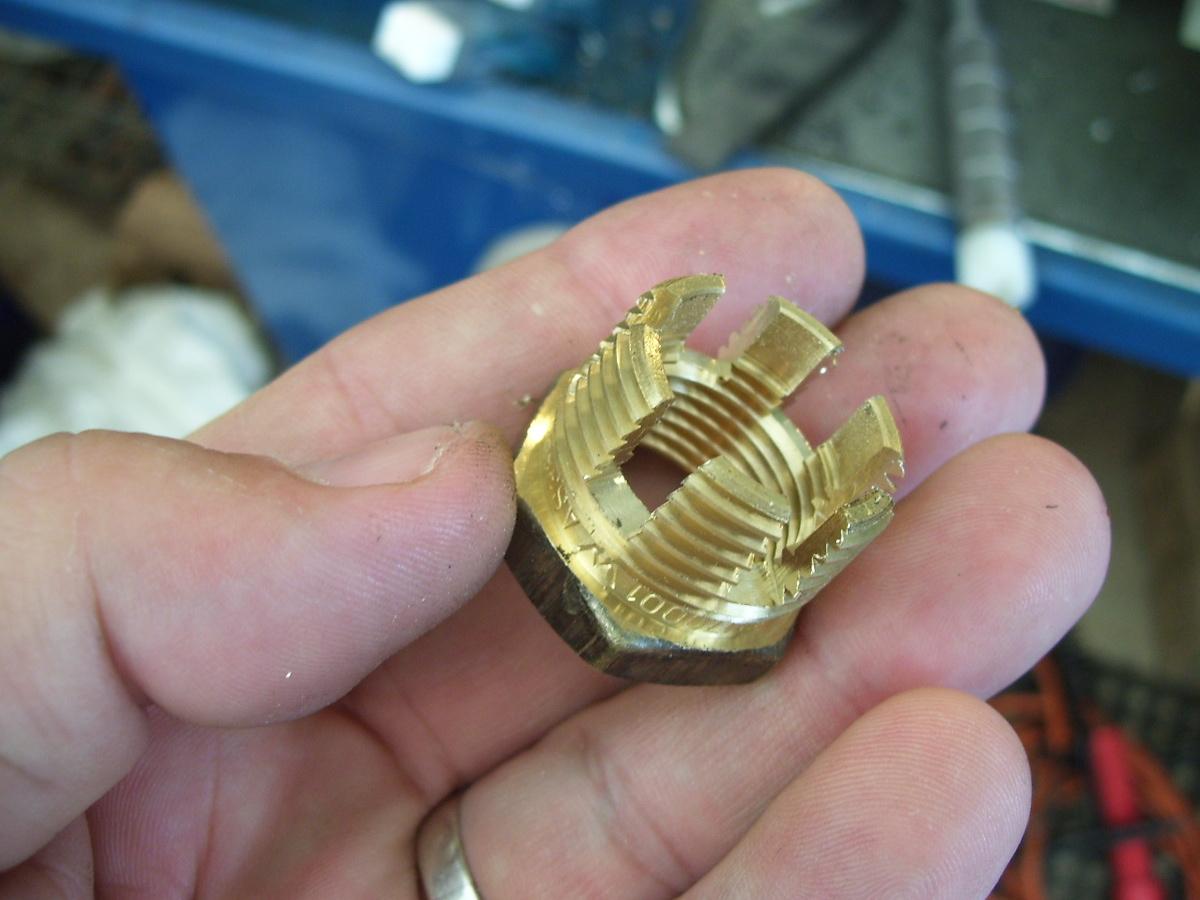
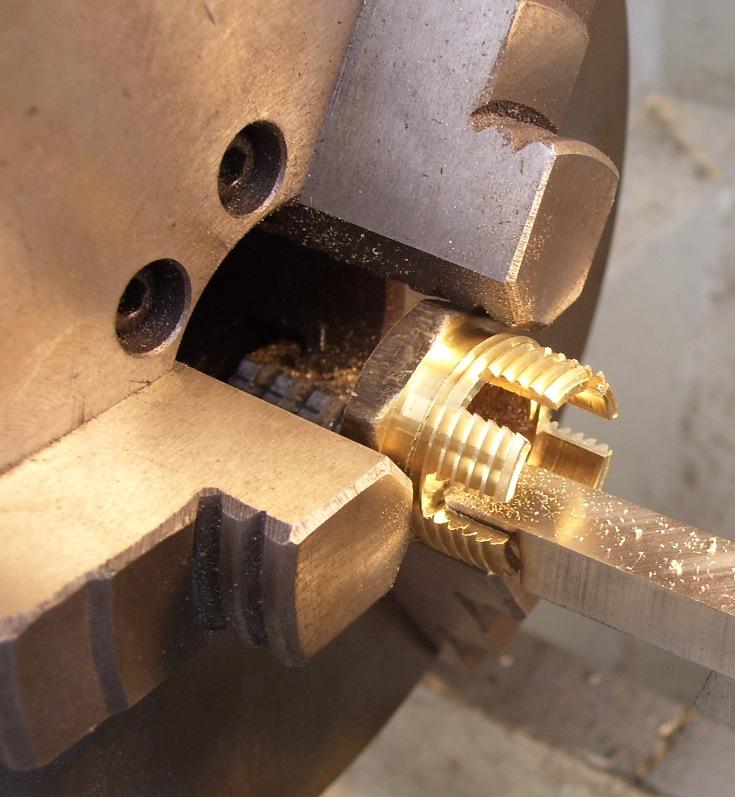
First steps were to mill the bush that would form the valve body. I should point out - I have a lathe, but not a mill - so I have the 4-flute endmill in the 3-jaw chuck, and the work in a vice attached to the cross-slide
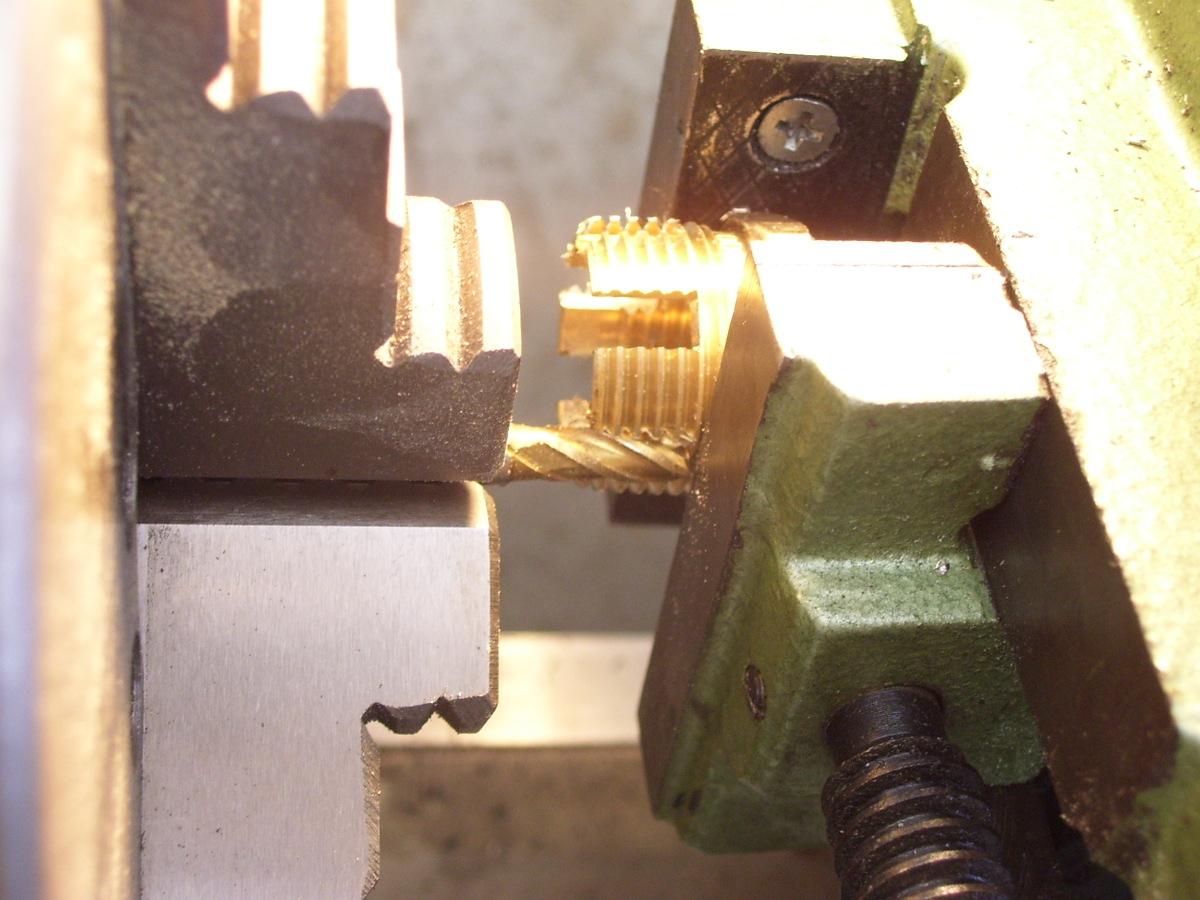
A reasonable start: (haven't cleaned any of the rough edges off here yet)
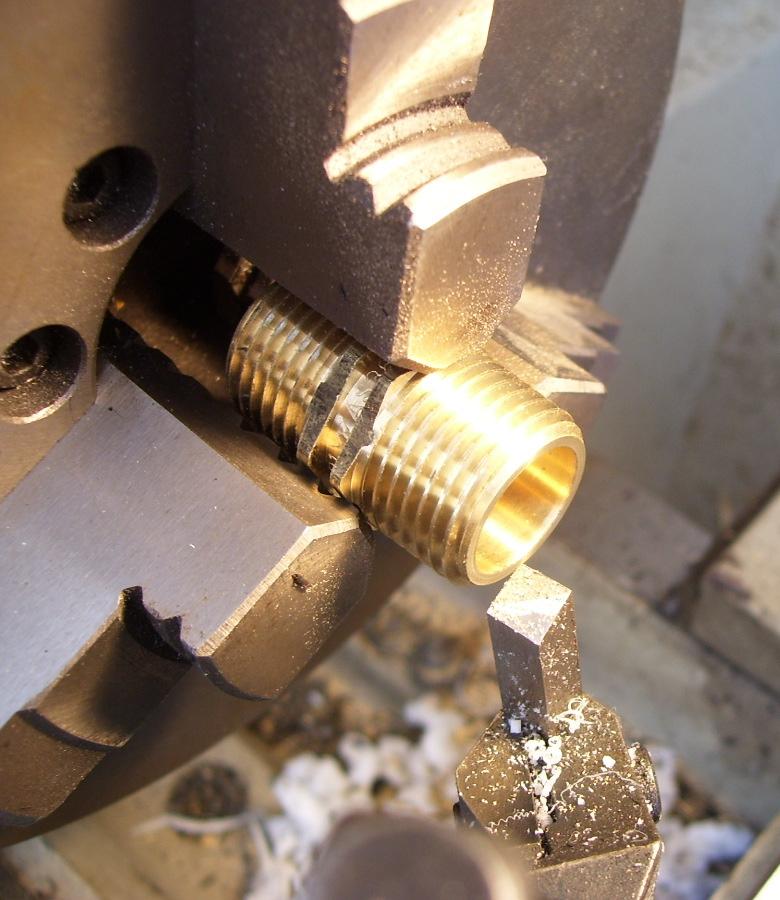
Bored the inside to remove the excess thread and make sure the standard tap washer would clear
Took a whisker off the face of the nipple that will become the valve seat, just to square it off and make it flat
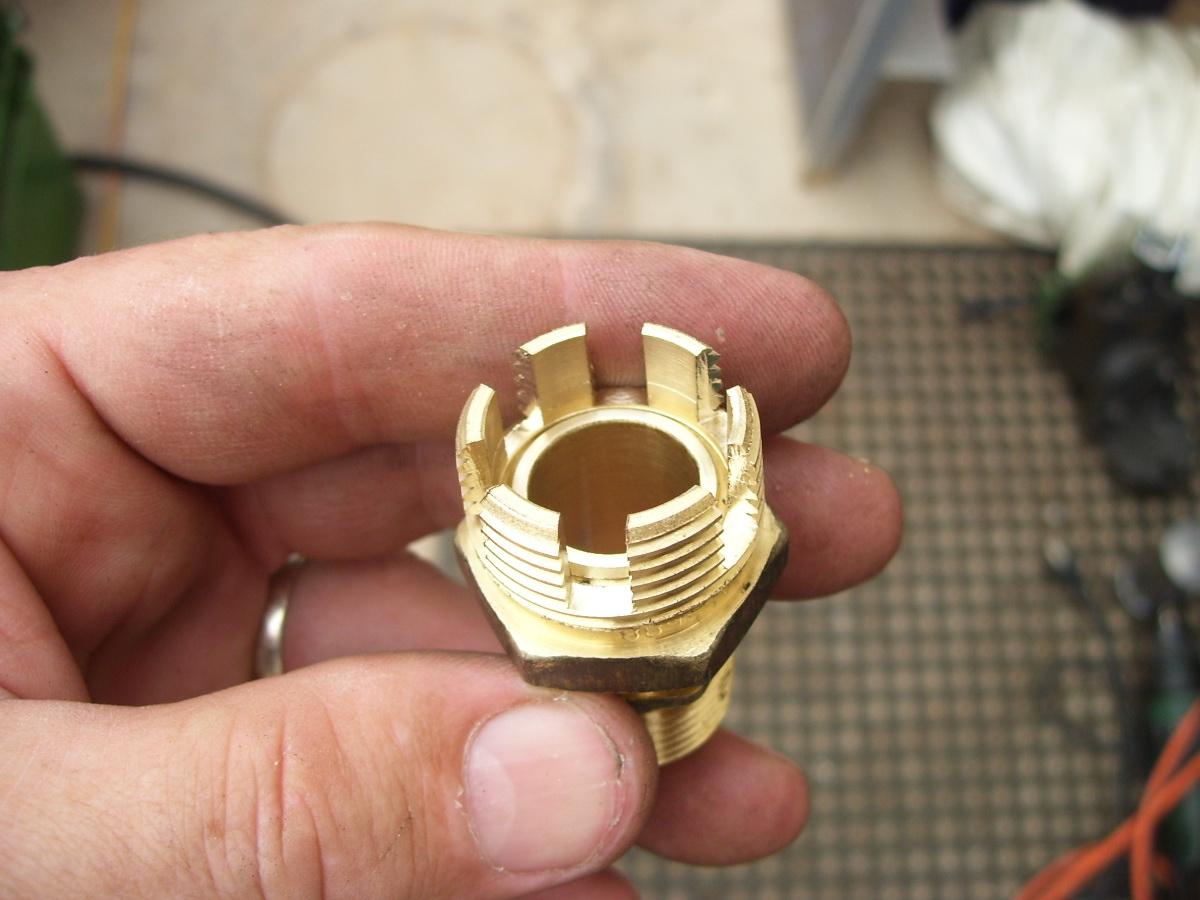
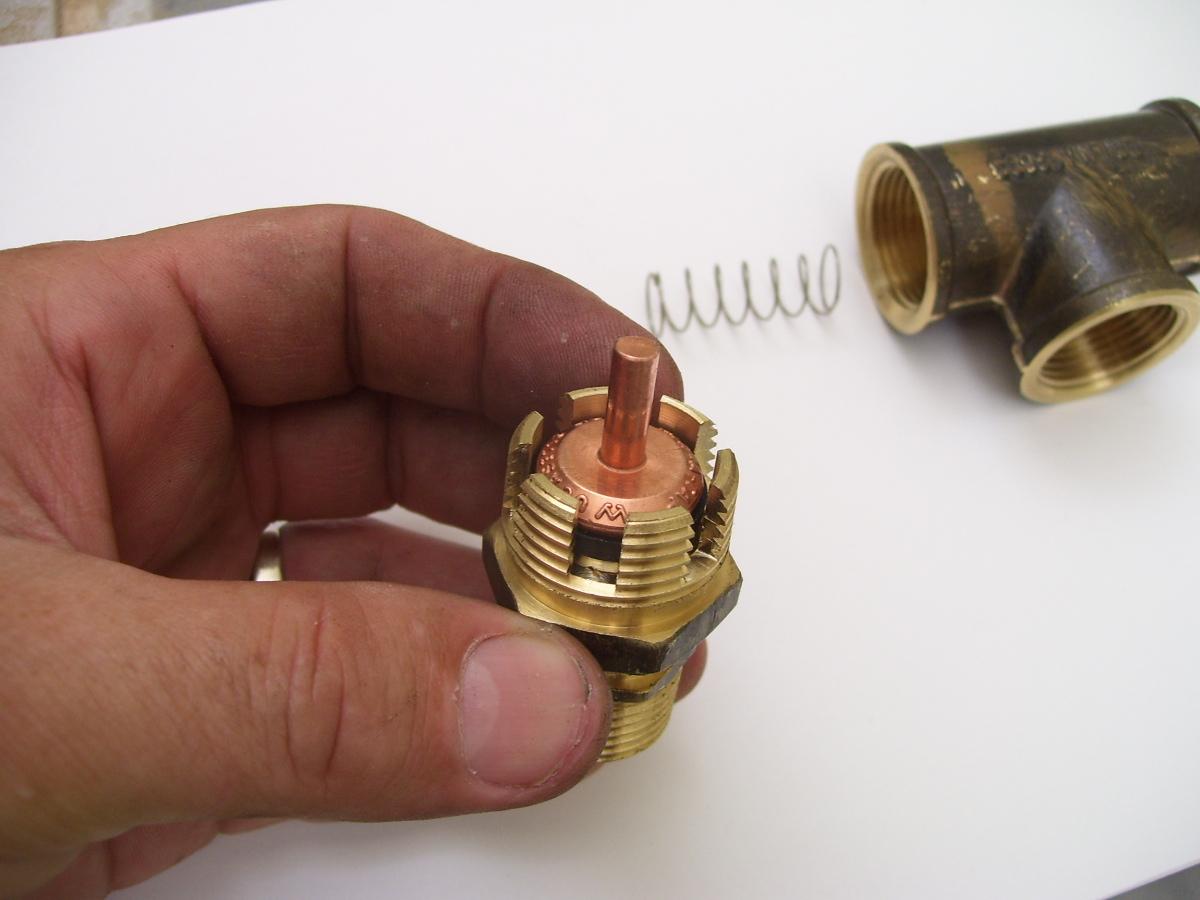
Assembled the whole base assembly. The face is about 0.25mm proud of the slots I milled.
The tap washer sits in the valve seat/body perfectly!
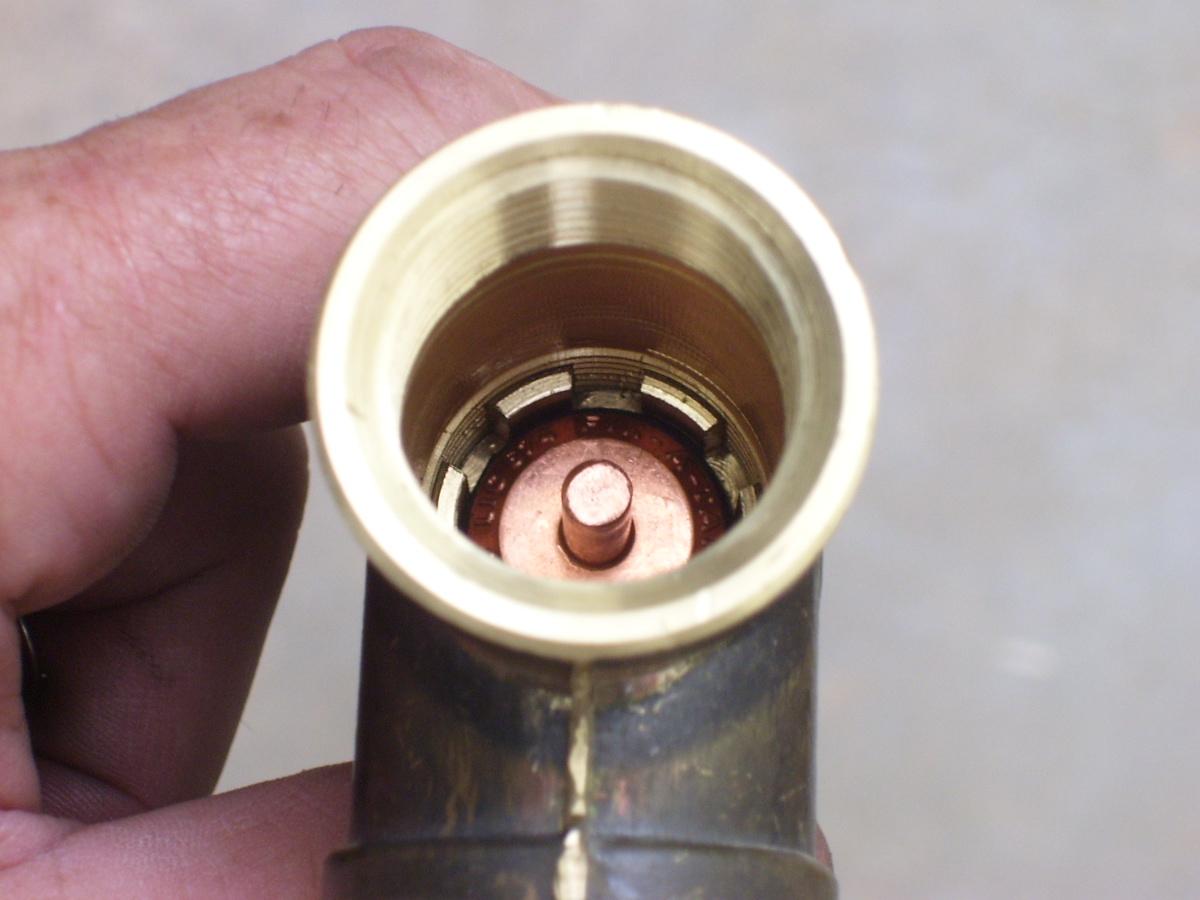
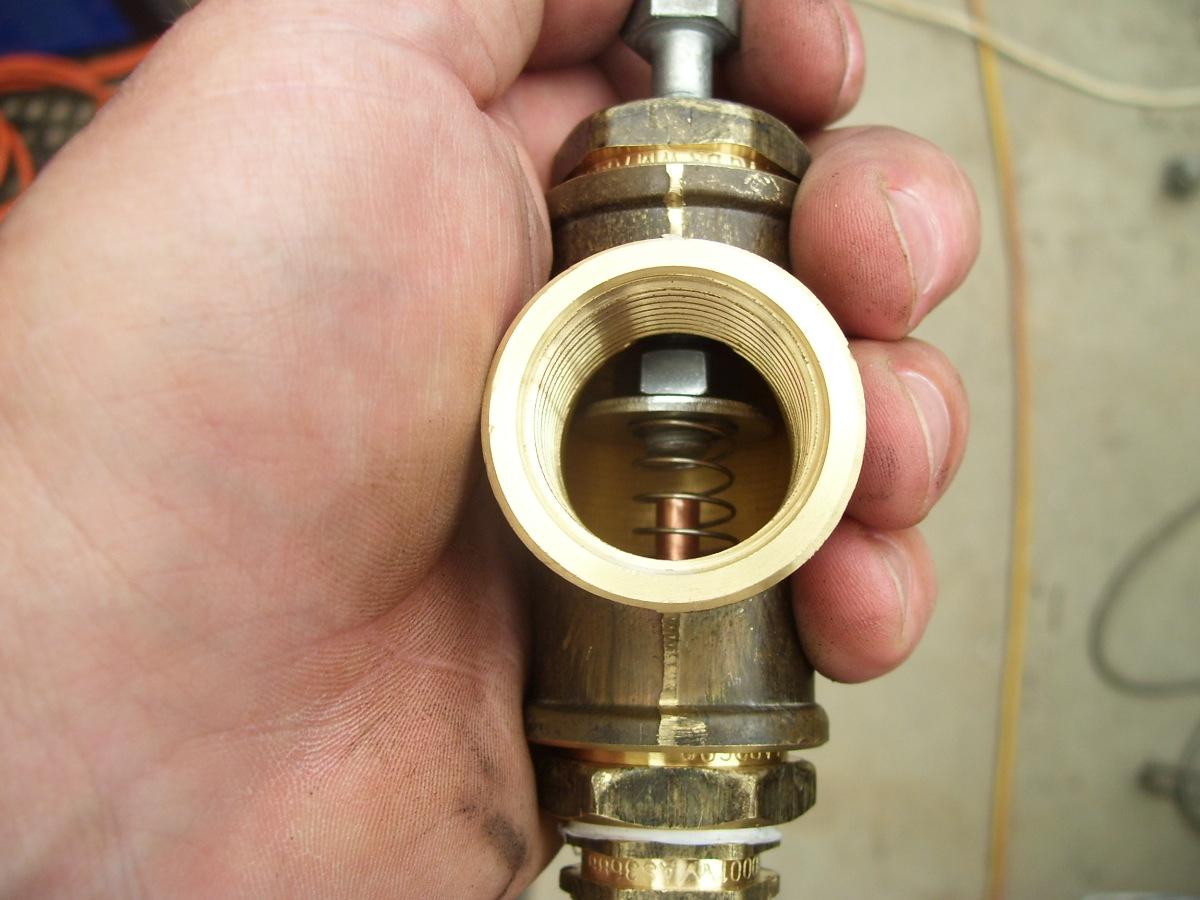
Looking down into the assembled valve you can see why I milled the slots - there's plenty of room for water and steam to escape
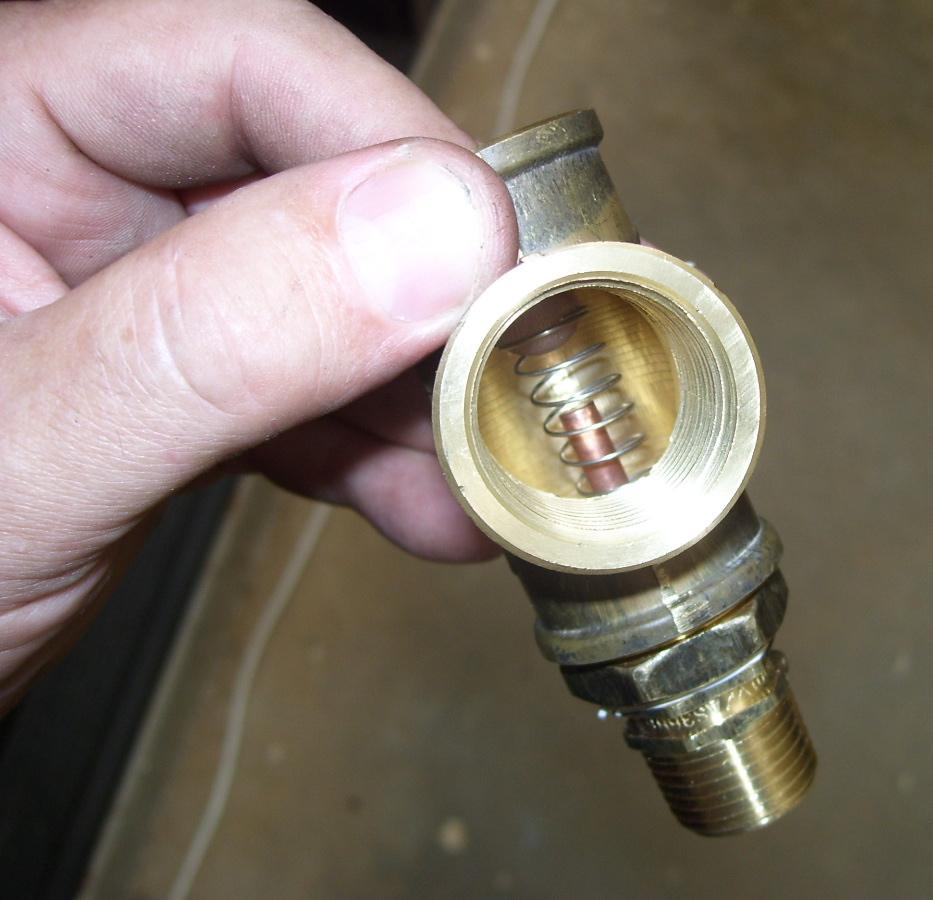
From the side looking into the exit port, you can see how simple it is:
The gal bolt is temporary, hard to get things on good friday with all the shops shut! This will let me easily adjust the operating pressure.
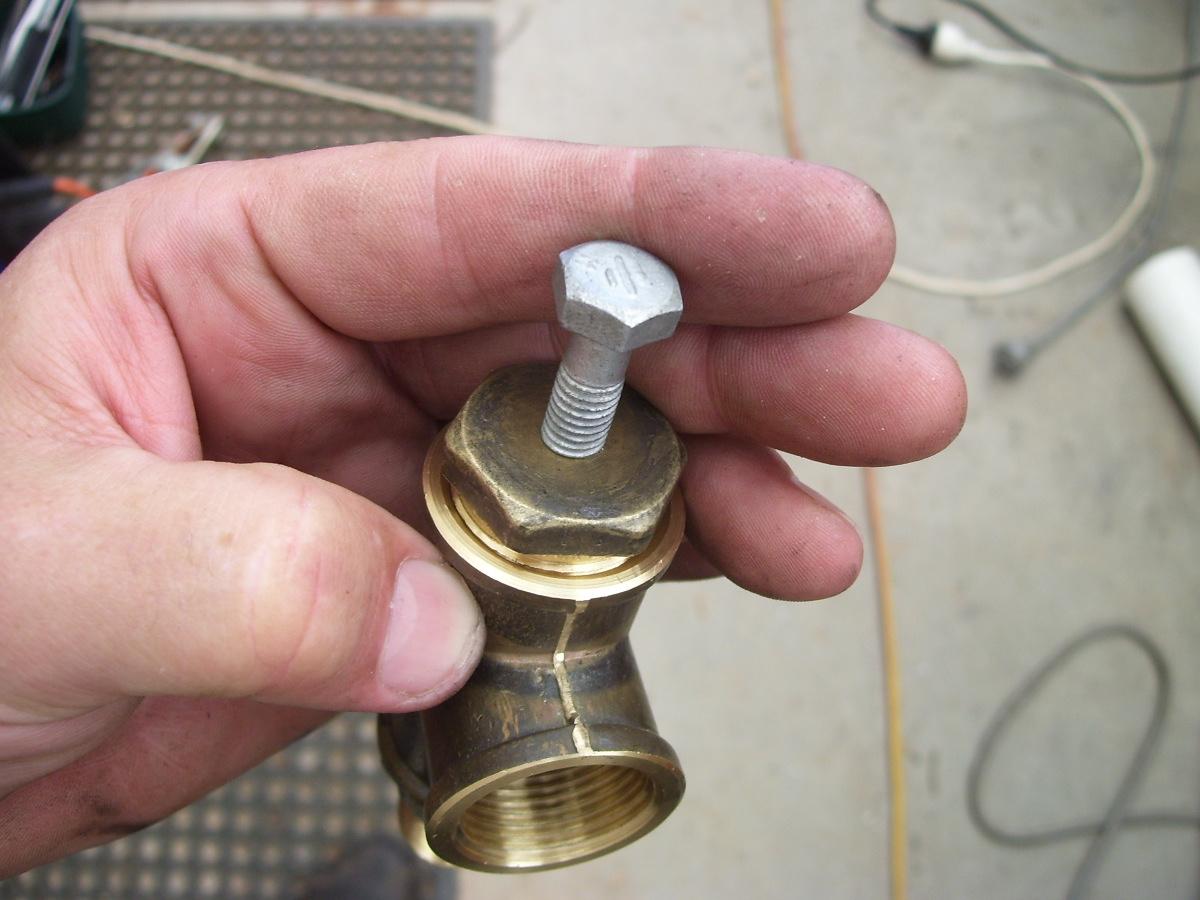
The nut and washer are just there to keep the spring in place and the right pressure on it
The whole thing was tested and works great. Variable from virtually zero to about 20psi with the spring I used. Now, what do I buy with the $350 odd that I saved? :)